Call Us
AI TRACKING
● REC 00:14:32
- Mon - Fri 10:00 - 18:00, Sat 10:00 - 15:00, Sunday - CLOSED
- Email: sales@israintech.com

-
-


WhatsApp
+92 321 1114772
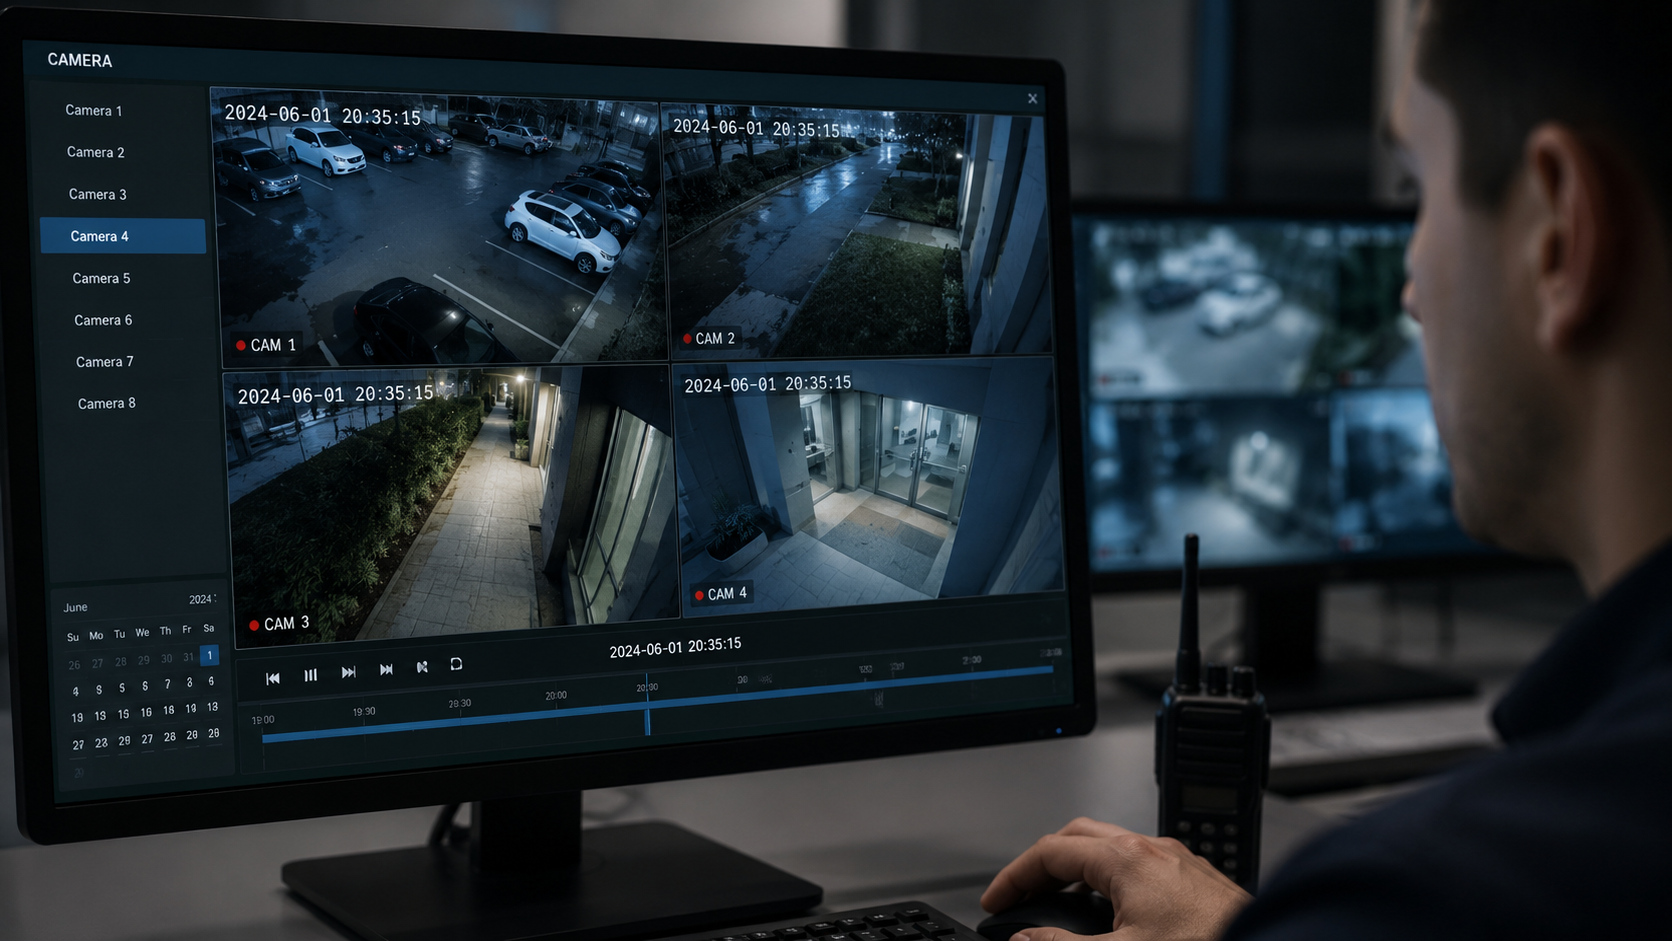
Something happened at your home or office, and you need to go back and see it: a missed delivery, a break-in, a dispute over “who did what,” or just routine security review. You know your CCTV system recorded it. The only problem? You’re not entirely sure how to actually pull up that old footage.
You’re not alone. This is one of the most common questions people have after installing a security camera system; the cameras are running, but reviewing past recordings feels more confusing than it should be. The good news is that once you understand the basic method, checking previous CCTV footage takes less than a minute, regardless of whether your system is a DVR, NVR, cloud-based, or app-controlled setup.
This guide walks you through every common method, step by step, so you can find exactly what you’re looking for.
First, Understand Where Your Footage Is Actually Stored
Before you can check previous footage, it helps to know where it’s being kept. Most CCTV systems store recordings in one of these ways:
| Storage Type | How It Works | Common Use Case |
| DVR (Digital Video Recorder) | Records footage from analog cameras onto an internal hard drive | Traditional home/office CCTV setups |
| NVR (Network Video Recorder) | Records footage from IP/network cameras onto an internal or external drive | Modern high-resolution CCTV/IP camera systems |
| SD Card (in-camera) | Footage stored directly inside the camera itself | Standalone wireless/Wi-Fi cameras |
| Cloud Storage | Footage uploaded and stored on a remote server via the internet | App-based smart cameras (subscription-based) |
| NAS/FTP Server | Footage sent to a separate network storage device | Larger commercial or multi-camera setups |
Method 1: Checking Previous Footage on a DVR/NVR (Monitor Connected)
This is the most common setup for home and business CCTV systems in Pakistan, where a physical monitor is connected directly to the recorder.
Steps:
- Turn on the monitor connected to your DVR/NVR and log in with your admin credentials.
- Right-click on the screen (or press the dedicated menu button on the remote) to bring up the main menu.
- Select “Playback” or “Search” from the menu options.
- Choose the camera channel you want to review — or select “all channels” if you’re unsure which one captured the event.
- Pick the date and time range you need. Most systems display a timeline bar at the bottom of the screen showing recorded segments in blocks.
- Click on the relevant time block or drag the timeline slider to the moment you want to view.
- Use the playback controls (play, pause, fast-forward, rewind, and frame-by-frame) to review the footage in detail.
- If needed, export the clip to a USB drive directly from the playback screen for evidence or sharing.
Method 2: Checking Previous Footage via a Mobile App
Most modern DVR/NVR brands (Hikvision, Dahua, EZVIZ, Reolink, and similar) come with companion mobile apps that let you check footage remotely, without being near the physical recorder.
Steps:
- Open the CCTV brand’s mobile app on your phone and log in to your account.
- Select the device or camera you want to review from your device list.
- Tap the “Playback” icon (usually shown as a clock or calendar icon).
- Choose the specific date from the calendar view — dates with available recordings are usually highlighted.
- Drag the timeline at the bottom of the screen to the specific time you want to check.
- Use pinch-to-zoom or the on-screen controls to focus on a particular area of the frame.
- Download or save the clip to your phone’s gallery if you need to keep or share it.
Tip: Make sure your phone is connected to a strong internet connection — since playback footage streams from your recorder or the cloud, weak Wi-Fi or mobile data can cause buffering or failed loading.
Method 3: Checking Footage Stored on an SD Card
If you’re using a standalone Wi-Fi camera without a separate DVR/NVR, footage is usually stored directly on a microSD card inside the camera.
Steps:
- Open the camera’s app and go to the device settings.
- Select “SD Card Playback” or a similarly labeled option.
- Browse by date and time to locate the footage you need.
- If the app can’t access the card, remove the SD card and insert it into a computer using a card reader to browse the video files manually.
Method 4: Checking Cloud-Stored Footage
If your system uses cloud recording (common with subscription-based smart cameras), footage isn’t stored locally at all — it lives on a remote server.
Steps:
- Log in to the manufacturer’s app or web portal using your registered account.
- Navigate to the “Cloud Playback” or “Events” tab.
- Filter by date, time, or event type (motion detected, person detected, etc.) to narrow down your search.
- Select the clip to stream it directly, or download it if your plan allows local saving.
Note: Cloud footage is usually only retained for a set number of days (often 7, 14, or 30 days depending on your subscription plan), so older footage may no longer be available if it wasn’t downloaded in time.
Quick Comparison: Which Method Applies to You?
| Your Setup | Best Method to Check Old Footage |
| Wired cameras with a physical DVR/NVR and monitor | Method 1 (on-site playback) |
| Wired/IP cameras managed through a brand’s mobile app | Method 2 (mobile playback) |
| Standalone Wi-Fi camera with SD card | Method 3 (SD card playback) |
| Subscription-based smart camera | Method 4 (cloud playback) |
Troubleshooting: Why Can’t I Find Old Footage?
If you’re struggling to locate previous recordings, here are the most common reasons:
- Storage overwritten: Most systems record in a continuous loop and overwrite the oldest footage once storage is full, typically after 7 to 30 days, depending on hard drive size and recording settings.
- Recording schedule limits: Some systems are set to record only during specific hours or only when motion is detected, so footage from “quiet” periods may not exist at all.
- Storage device failure: A corrupted SD card or failing hard drive can prevent playback entirely. Try reformatting the storage device (after backing up anything important) or replacing it if the issue persists.
- Incorrect date/time settings: If your DVR/NVR’s internal clock is wrong, footage may be filed under the wrong date, making it harder to locate.
- Permission restrictions: On shared or business systems, some user accounts may not have permission to access playback — check with your system administrator.
- Weak network connection: For app or cloud-based playback, poor internet connectivity can prevent footage from loading or cause it to buffer indefinitely.
Tips to Make Future Footage Easier to Find
- Set your DVR/NVR clock correctly right after installation, and check it periodically; an incorrect time stamp is one of the most common reasons people struggle to locate footage later.
- Use a larger hard drive if you need footage retained for longer periods; more storage means a longer recording history before older clips get overwritten.
- Label your cameras clearly (e.g., “Front Gate,” “Parking Area”) so you can quickly identify the right channel during playback.
- Back up important clips immediately rather than waiting — once storage cycles through, that footage is gone for good.
- Test your playback system regularly, not just when you actually need it; this way you’ll already know exactly how to navigate it during an actual emergency.
Final Thoughts
Checking previous CCTV footage isn’t complicated once you know where your footage lives and which playback method applies to your system — DVR/NVR, mobile app, SD card, or cloud. The key is knowing your setup, keeping your system’s date and time accurate, and backing up important clips before they get overwritten.
If you’re setting up a new CCTV or smart security system, or upgrading an older one that’s become difficult to manage, Israintech’s team can help you choose the right recorder, storage capacity, and camera setup so reviewing footage is always fast and hassle-free, whenever you need it.
FAQs
How far back can I check CCTV footage?
This depends on your storage capacity and recording settings. Most home systems retain footage for 7 to 30 days before it’s overwritten, while larger hard drives or lower recording resolutions can extend this significantly.
Can I check CCTV footage without a DVR/NVR?
Yes, if your cameras use an SD card or cloud storage, you can review footage directly through the camera’s mobile app without needing a separate recorder.
Why is my CCTV playback showing no footage for a specific date?
This usually means the footage was already overwritten, the system wasn’t recording during that period, the date/time settings are incorrect, or the storage device has an issue.
Can I check CCTV footage remotely from my phone?
Yes, most modern DVR/NVR and camera brands offer a mobile app that allows remote playback, as long as your device is connected to the internet and properly linked to your account.
How do I save or export CCTV footage once I find it?
On DVR/NVR systems, you can export clips to a USB drive directly from the playback screen. On mobile apps, you can usually download the clip to your phone’s local storage or gallery.

Leave A Comment