Call Us
AI TRACKING
● REC 00:14:32
- Mon - Fri 10:00 - 18:00, Sat 10:00 - 15:00, Sunday - CLOSED
- Email: sales@israintech.com

-
-


WhatsApp
+92 321 1114772
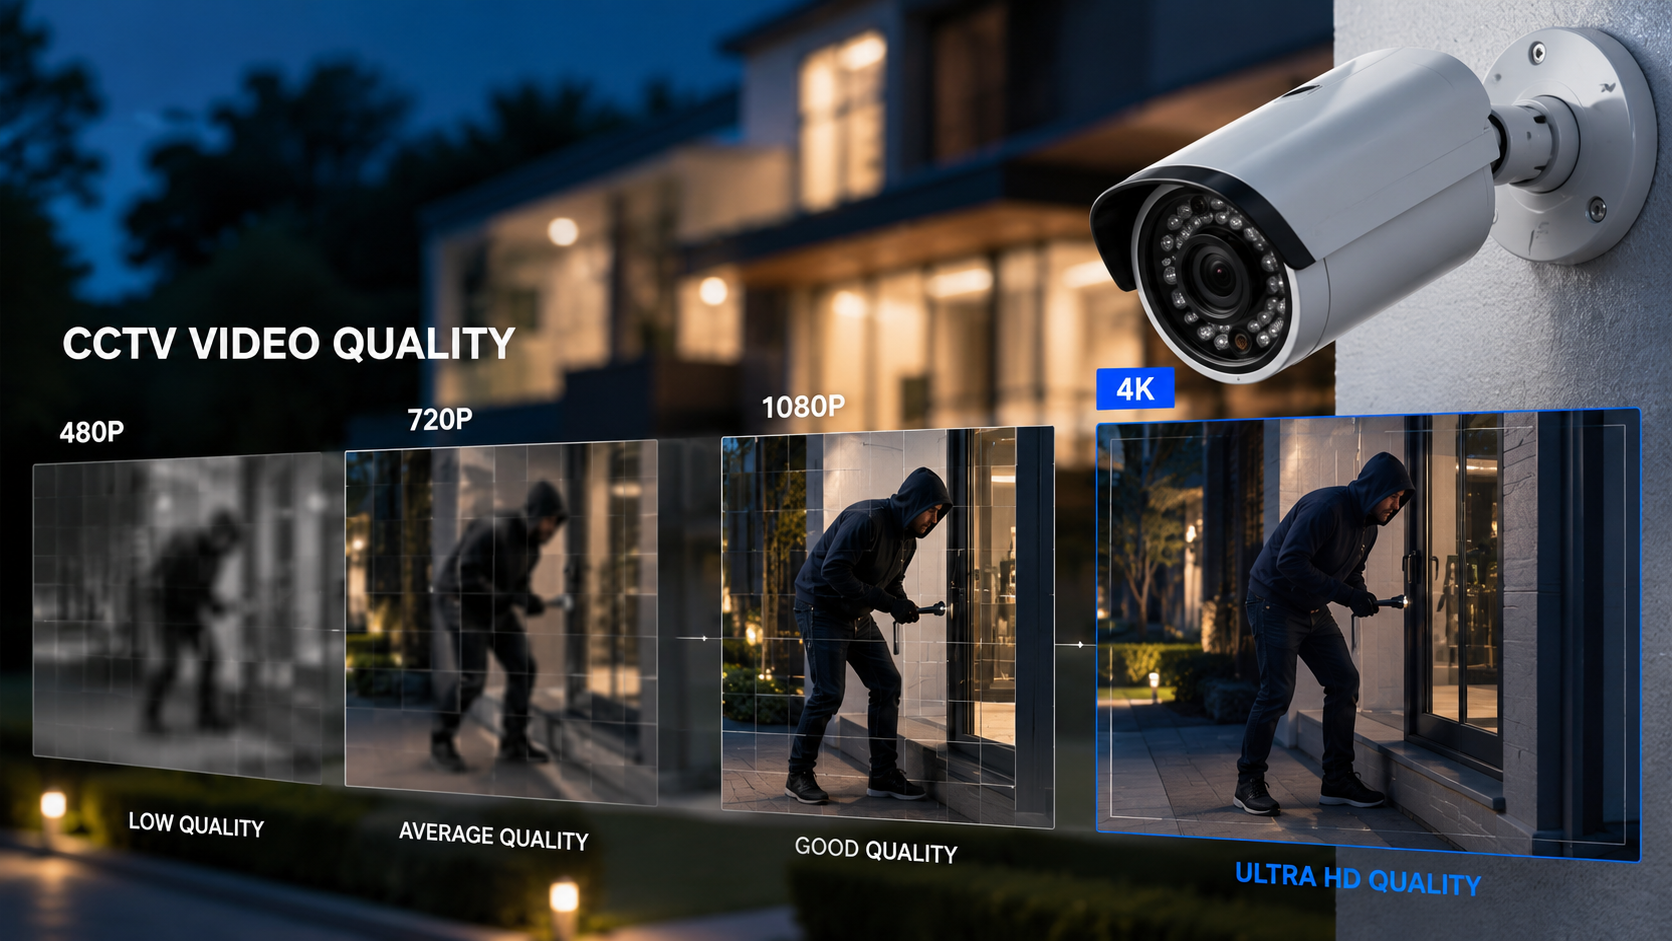
There’s nothing more frustrating than pulling up CCTV footage after an incident, a break-in, a package theft, a dispute at your business, only to find the video is blurry, grainy, or too dark to make out a face or license plate. A CCTV system is only as useful as the footage it actually captures, and poor video quality is one of the most common complaints among security camera owners.
The good news is that video quality issues are almost always fixable, and the fix usually falls into one of two categories: improving quality at the source (so your cameras capture better footage in the first place) or enhancing footage you’ve already recorded (using software to clean up what you’ve got). This guide walks through both, so whether you’re setting up a new system or trying to rescue an old blurry clip, you’ll know exactly what to do.
Why Is Your CCTV Footage Poor Quality in the First Place?
Before jumping into fixes, it helps to understand what’s actually causing the problem. Here are the most common culprits:
| Cause | Effect on Footage |
| Low camera resolution | Pixelated, unclear detail, especially when zoomed in |
| Poor lighting/glare | Overexposed, washed-out, or too-dark footage |
| Dirty or scratched lens | Hazy, blurry, or foggy-looking video |
| Weak Wi-Fi/network bandwidth (IP cameras) | Choppy playback, dropped frames, low-res streaming |
| Old analogue camera system | Naturally lower resolution and detail than modern IP cameras |
| Incorrect camera settings | Poor brightness/contrast, wrong frame rate, low bitrate |
| Camera shake or poor mounting | Blurry motion, unstable footage |
| Excessive digital zoom | Loss of detail and sharpness beyond the camera’s native resolution |
Part 1: Improving Video Quality at the Source
This is the most effective long-term solution; fixing the root cause is always better than trying to repair bad footage after the fact.
1. Upgrade to Higher-Resolution Cameras
Resolution is the single biggest factor in video clarity. If your system still uses older analogue cameras, switching to modern IP (network) cameras makes an immediate difference — digital IP cameras deliver sharper images, better compression, and more detail overall.
| Resolution | Typical Use Case |
| 720p (HD) | Basic monitoring, tight budgets |
| 1080p (Full HD) | Standard homes and small businesses |
| 4MP – 5MP | Larger properties, better zoom-in detail |
| 4K (8MP) | Businesses needing license plate/facial recognition detail |
Higher resolution does mean larger file sizes, so make sure your storage (DVR/NVR hard drive) and network bandwidth can comfortably support it.
2. Fix Your Lighting
Poor lighting is one of the most underrated causes of bad footage — many people blame the camera when the real issue is how the scene is lit.
- Avoid pointing cameras directly at bright light sources (sun, streetlights, headlights), which causes glare and washed-out footage.
- Add supplementary lighting in dark areas your cameras cover, such as entry points and parking areas.
- For 24/7 coverage, choose cameras with strong infrared (IR) night vision or built-in low-light/starlight sensors, which capture clear footage even in near-total darkness.
- Position cameras slightly downward rather than straight ahead, to reduce glare and capture faces more clearly.
3. Clean and Maintain Your Cameras Regularly
Dust, cobwebs, water spots, and grime on the lens are a surprisingly common cause of hazy or blurry footage. Make it a habit to:
- Wipe camera lenses gently with a microfiber cloth every 1–2 months (more often in dusty environments).
- Check housings and covers for cracks, condensation, or water damage.
- Inspect cabling and connectors periodically to avoid signal loss or interference, especially for analogue systems.
4. Adjust Camera and Recorder Settings
Most CCTV systems allow you to fine-tune settings through the camera or DVR/NVR software interface. Key settings worth reviewing:
| Setting | What It Does | Recommendation |
| Resolution | Overall image detail | Set to the highest your storage/bandwidth supports |
| Bitrate | Data used to encode video | Higher bitrate = better quality, but larger file sizes |
| Frame Rate (FPS) | Smoothness of motion | 15–30 FPS for most home/business use |
| Brightness/Contrast | Visibility in different lighting | Adjust based on the specific area covered |
| Sharpness | Edge/detail clarity | Increase slightly, but avoid overdoing it (causes noise) |
| WDR (Wide Dynamic Range) | Balances bright and dark areas in the same frame | Enable for entrances with strong backlighting |
5. Improve Network Conditions (For IP/Wi-Fi Cameras)
If you’re using network-based cameras, poor Wi-Fi signal or insufficient bandwidth can quietly ruin footage quality, even if the camera itself is high-resolution.
- Position your router or network switch closer to your cameras, or use a wired connection where possible.
- Avoid overloading a single network with too many high-resolution cameras without adequate bandwidth.
- Use a dedicated NVR with local storage rather than relying entirely on cloud streaming, especially for high-resolution setups.
6. Secure and Stabilize Your Mounting
Loose or vibrating camera mounts can cause blurry, shaky footage, especially in outdoor installations exposed to wind. Make sure brackets are firmly secured, and avoid mounting cameras on unstable surfaces like thin sheet metal or loose fencing.
Part 2: Enhancing Footage You’ve Already Recorded
Sometimes you’re not setting up a new system; you already have a clip that’s blurry, dark, or low-resolution, and you need to make the best of it. This is where video enhancement software comes in.
What These Tools Can (and Can’t) Fix?
| Enhancement Type | What It Does | Best For |
| Resolution Upscaling | Uses AI to add detail and sharpness to low-res footage | Making footage clearer when zoomed in |
| Noise Reduction | Removes graininess, especially in low-light footage | Cleaning up night-time recordings |
| Brightness/Contrast Correction | Balances overexposed or too-dark scenes | Improving visibility in poorly lit footage |
| Deblurring/Stabilization | Reduces motion blur and camera shake | Clarifying moving subjects or shaky footage |
It’s important to set realistic expectations: enhancement software can meaningfully improve clarity, but it can’t invent detail that was never captured in the first place. A heavily pixelated face at extreme distance will improve, but it won’t suddenly become identifiable if the original resolution was too low to begin with.
General Steps to Enhance Recorded Footage
- Export the clip you want to enhance from your DVR/NVR or camera app in the highest available quality.
- Import it into a video enhancement tool (many offer AI-based upscaling, noise reduction, and stabilization features).
- Select the specific enhancement needed, upscaling for low resolution, noise reduction for grainy night footage, or deblurring for motion blur.
- Preview the result before committing, since over-enhancing can sometimes introduce artifacts or an unnatural look.
- Export using a high-quality format (MP4 with a high bitrate is generally recommended) to preserve the improvements.
Quick Comparison: Fix at the Source vs. Enhance After Recording
| Approach | Pros | Cons |
| Improve at the source | Permanent fix, better footage going forward | Requires equipment upgrades or setting changes |
| Enhance existing footage | Works on footage you already have | Limited by the original recording’s quality |
For anyone setting up a new or upgraded CCTV system, the smartest approach is to invest in getting quality right at the source: resolution, lighting, and proper installation, rather than depending on enhancement software after the fact.
Final Thoughts
Improving CCTV video quality comes down to two things: making sure your cameras are capturing the clearest possible footage to begin with, and knowing how to responsibly enhance existing recordings when you need extra clarity. Resolution, lighting, lens maintenance, and correct settings solve the vast majority of quality complaints, and they’re all within your control.
If your current CCTV setup is consistently producing blurry, dark, or unclear footage, it may be time for a professional review rather than constant after-the-fact fixes. Israintech’s team can assess your existing cameras, recommend the right resolution and lighting setup for your property, and handle a full upgrade or new installation designed to get clear, reliable footage every time.
FAQs
Why is my CCTV footage blurry even with a high-resolution camera?
This is usually caused by poor lighting, a dirty lens, incorrect camera settings, or excessive digital zoom — resolution alone doesn’t guarantee clear footage if these other factors aren’t addressed.
Can I improve old, already-recorded CCTV footage?
Yes, to an extent. AI-based video enhancement tools can improve resolution, reduce noise, and correct brightness, but they can’t add detail that wasn’t captured in the original recording.
What resolution is best for CCTV cameras?
1080p is generally sufficient for most homes and small businesses, while 4MP–4K is recommended for areas needing facial or license plate detail, such as entrances and parking areas.
Does better internet improve CCTV video quality?
For IP/Wi-Fi cameras, yes, weak network bandwidth can cause dropped frames and lower streaming quality even if the camera itself supports high resolution.
How often should I clean my CCTV cameras for the best video quality?
Every 1–2 months under normal conditions, and more frequently in dusty or high-pollution environments, since a dirty lens is one of the most common causes of hazy footage.

Leave A Comment